This guide shows you how to draw a person standing, full body, from a blank page to a clothed figure. It uses a stick skeleton and a few measurements, so you don't need to know any anatomy yet.
Work lightly in pencil. The first seven steps are scaffolding that you'll erase.
Three measurements before you start
- An adult is about seven and a half heads tall. Anywhere from seven to eight looks natural.
- The halfway point of the body is the hips, not the waist. The legs take up the whole lower half.
- Arms are longer than you think. Elbows sit at the waist, wrists at the hips and fingertips reach the middle of the thigh.
How to draw a person step by step
- Draw the head as an oval near the top of the page.
- Mark the ground. Measure seven and a half head-heights down from the top of the head and draw a short line. Doing this first means you never run out of paper for the feet.
- Mark the halfway point between the top of the head and the ground. This is the hip line.
- Draw the spine as a line from the base of the head to the hip line.
- Add the shoulder line a little below the chin, about two head-heights wide. Add a hip line slightly narrower than the shoulders.
- Draw the arms as sticks. Put a dot for each elbow level with the waist and a dot for each wrist level with the hip line.
- Draw the legs as sticks. Put the knee dots halfway between the hips and the ground, and the ankle dots just above the ground line.
- Build the torso. Join the shoulders to the hips with a shape that narrows at the waist.
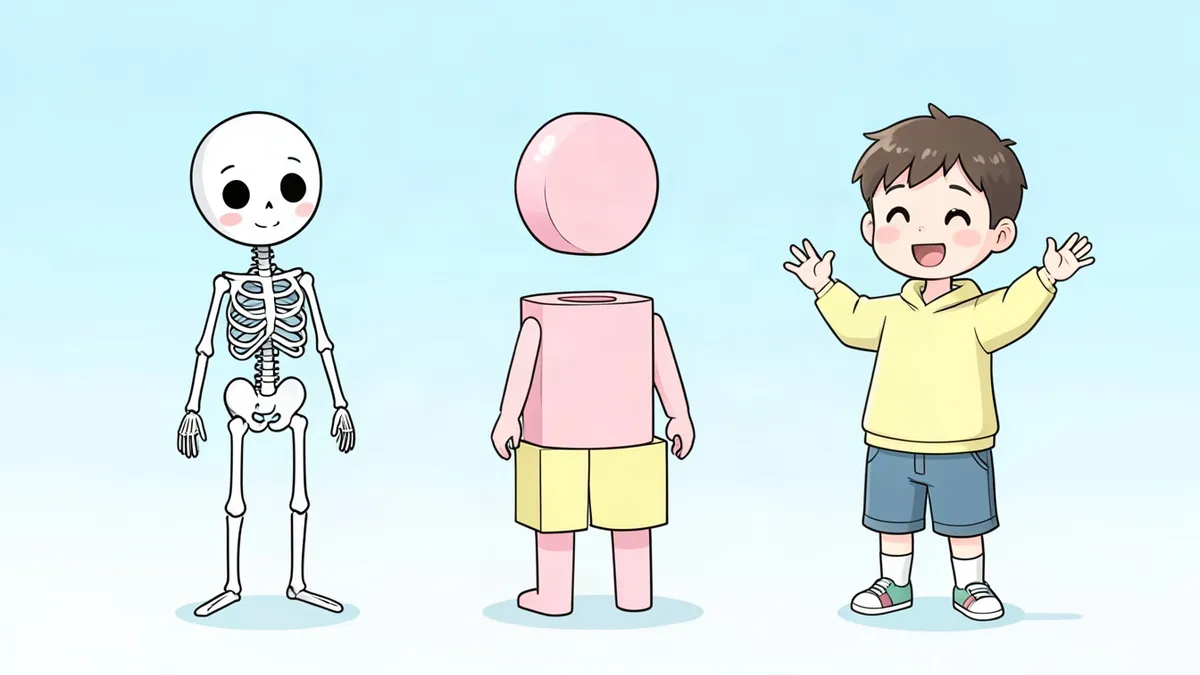
- Thicken the limbs. Draw a tube around each stick, wider near the body and narrower at the wrists and ankles.
- Add hands and feet. Hands start as simple mitten shapes about as long as the face. Feet are wedges that point slightly outward.
- Add the neck and shoulders. The neck is a short cylinder. Let the shoulders slope down from it. They are not a straight coat hanger.
- Draw the clothes over the body. Sleeves and trouser legs sit a little outside the limbs. Add a few folds where the body bends: elbows, knees and waist.
- Add the face and hair, then ink the lines you want and erase the skeleton. For the face, see how to draw a face.
Make the pose less stiff
A figure with even shoulders and straight legs looks like a signpost. Three changes fix it:
- Shift the weight to one leg. The hip rises on the side of the standing leg, and the shoulders tilt the opposite way.
- Keep the balance. In a standing pose, the pit of the neck sits roughly above the foot that carries the weight.
- Break the symmetry. Bend one arm, turn the head or put one hand in a pocket.
An easier version: the cartoon person
If the full method feels like too much, shrink the proportions:
- Draw a large round head.
- Make the whole figure only four or five heads tall.
- Draw the body as a simple bean or rounded rectangle.
- Use plain tubes for arms and legs, mittens for hands and ovals for feet.
- Keep the face to two dots and a curve.
The same landmarks apply. The legs still start halfway down, and the hands still reach the thighs.
Drawing a man or a woman
Artists usually signal a typical male figure with shoulders wider than the hips, a straighter waist and a thicker neck. A typical female figure is often drawn with narrower shoulders, a more defined waist and hips about as wide as the shoulders. These are conventions for quick reading. Real bodies come in every combination, so change the widths freely.
Common mistakes and how to fix them
- Running out of room. Mark the head and the ground line before anything else.
- A head that's too large. Count seven to eight head-heights for an adult.
- Short arms. Check that the wrists reach the hip line.
- Tiny hands and feet. A hand is about as long as the face. A foot is longer than that.
- A neck like a pencil. It's a sturdy cylinder nearly as wide as the jaw.
- Feet drawn side-on under a front-facing body. Draw them as wedges pointing toward you and slightly out.
Practice drills
- Ten skeletons. Draw ten stick skeletons with the head, ground, hip, elbow, wrist and knee marks in place. One minute each.
- Three stances. Draw the same person standing straight, standing with the weight on one leg and taking a step.
- Mirror photo. Take a full-length photo of yourself, count your own height in heads and draw from it.
- Two styles. Draw one person realistically and again as a four-head cartoon, keeping the same outfit.
From a person to a character
A person becomes a character when you decide who they are: what they wear, how they stand, what they carry. The guide to OC drawing picks up from here. If you want a finished character design to copy while you practice, describe one in the Character Creator and redraw it using the steps above.
Related lessons: how to draw a body for the shapes under the clothes, how to draw people for groups and variety, and how to draw hands.
FAQ
What is the easiest way to draw a person?
Start with a stick skeleton. Mark the head, the ground and the halfway point, add shoulder and hip lines, then draw tubes around the sticks. Details come last.
How many heads tall is a person?
An average adult is about seven and a half heads tall. Children are shorter in heads because their heads are larger for their bodies, around four to six.
How do I draw a person who doesn't look stiff?
Put the weight on one leg so the hips and shoulders tilt in opposite directions, and avoid perfect symmetry in the arms.
How do I draw a person's full body in proportion?
Use the halfway rule. The hips sit at the midpoint of the height, the knees halfway down the legs, the elbows at the waist and the wrists at the hips.