Knowing how to draw hands means knowing how to draw them doing things: gripping, pointing, resting, reaching. A flat open hand is only the start. This guide gives you one method that works for any pose, then walks through the five poses you'll need most.
If you haven't drawn a basic open hand yet, begin with how to draw a hand and come back.
Think of the hand as three parts
- The palm is a flat box with real thickness. It can bend a little, as when you cup water.
- The fingers are four chains of three short cylinders. They usually move as a group.
- The thumb is its own unit, a wedge of muscle on the side of the palm with two segments on top. It works opposite the fingers.
How to draw hands in any pose, step by step
- Find the palm box. Ask which side faces you and how it's tilted, then draw it as a box with a top, a side and a thickness.
- Attach the thumb wedge to the correct side of the box.
- Draw the fingers as one mitten. A single shape shows which way they point and how much they curl.
- Split the mitten. Divide it into fingers. The two middle fingers often stay together, while the index and little finger drift apart.
- Break each finger at the joints. Draw the segments as short cylinders. Where one overlaps another, draw the front one over the back one.
- Check the arcs. Each row of joints forms a curve, even when the hand is closed.
- Refine the outline. Fingers are straighter and bonier along the back and soft and padded on the palm side.
Five hand poses worth learning
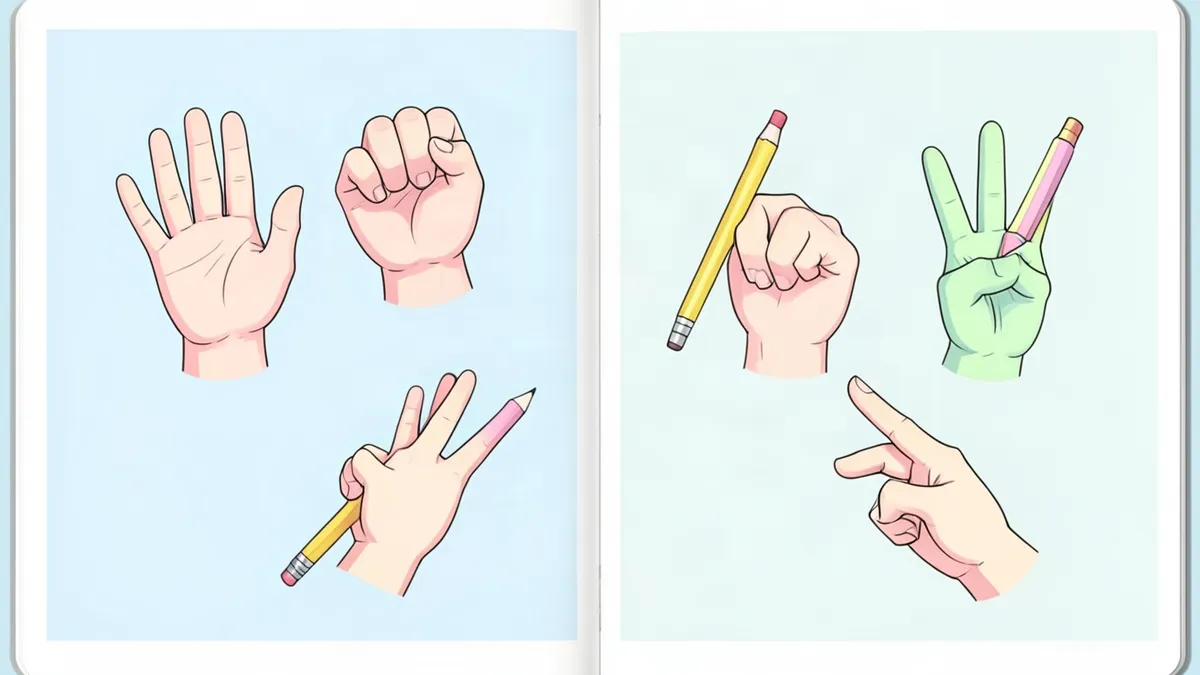
Relaxed hand. When an arm hangs at the side, the fingers curl gently. The index finger is the straightest and the little finger curls the most. The thumb rests near the index finger.
Fist. Fold the finger mitten down into a second box in front of the palm box. From the front, the four knuckles form an arc with the middle knuckle highest. The thumb lies across the outside of the index and middle fingers. It is not tucked inside.
Pointing. Draw a fist, then extend the index finger from its knuckle. If the finger points at the viewer, draw each segment as a short overlapping cylinder, with the fingertip as the largest circle in front.
Hands holding something. Draw the object first. Place the palm box against it, wrap the finger mitten around the far side and put the thumb on the near side, opposite the fingers. Erase the parts the object hides. For a pencil, three fingers do the work: thumb, index and middle.
Open hand reaching forward. The palm becomes the biggest shape and the fingers shorten into stacked, overlapping forms. Draw what you see, even when it looks too short.
How to draw a hand drawing a hand
The well-known image of two hands sketching each other is a good exercise in shading:
- Draw a sheet of paper lying at an angle.
- Draw one hand in the pencil-holding pose, coming out of a shirt cuff. Shade the hand fully, but leave the cuff as a flat outline.
- Turn your page around and draw a second hand the same way, so each pencil tip touches the other hand's cuff.
The contrast between the shaded hands and the flat cuffs creates the illusion that the drawing is drawing itself.
Common mistakes and how to fix them
- Starting with the finger outline. Start with the palm box. Fingers drawn first rarely connect properly.
- Every finger doing the same thing. Vary the curl. Real fingers are never perfectly matched.
- Hands too small. An open hand covers most of the face. Check yours against the head of your figure.
- The thumb inside the fist. It wraps across the outside of the first two fingers.
- A hand with no wrist. Draw a few lines of the forearm first so the hand flows out of the arm.
- Avoiding hands. Hiding them in pockets works once. After that, practice.
Practice drills
- Twenty mittens. Pose your free hand twenty ways and draw each as a palm box, thumb wedge and mitten only. Ten minutes in total.
- Five objects. Draw your hand holding a mug, a pen, a phone, a ball and a key.
- Fist turnaround. Draw a fist from the front, the side, the top and a three-quarter view.
- Life and mirror. Draw one pose from your own hand, then draw the same pose from its reflection to get the opposite hand.
Give your characters expressive hands
Hands carry as much emotion as faces. A character who grips, points or fidgets tells you who they are. To get a character to practice on, make one in the Character Creator, then redraw the portrait with the hands doing something new. The character design tips guide has more on posing and gesture.
Related lessons: how to draw a body and how to draw a person. For a real test, see hard things to draw.
FAQ
How do you draw hands easily as a beginner?
Use three shapes: a box for the palm, a mitten for the fingers and a wedge for the thumb. Get those right for the pose, then divide the mitten into fingers.
How do I draw hands holding something?
Draw the object first, then fit the palm against it, wrap the fingers around the far side and place the thumb opposite them. Erase whatever the object covers.
How long does it take to get good at drawing hands?
It varies, but short daily practice works better than rare long sessions. Ten minutes a day of quick mitten poses from your own hand shows results within a few weeks.
Is there a PDF for learning how to draw hands?
You don't need one. Your own free hand is a better reference than any printed sheet because you can turn it to any angle. Copy the steps above into your sketchbook and work from life.